How to get your Office 365 environment up and running in minutes, part 2
Office 365 E1 trial is Microsofts 6 months free trial that includes Office 365 E1 product suite. Microsoft is making this special E1 Trial license available in response to the increased need for employees to work from home in response to the COVID-19 (coronavirus) outbreak.
Also read Part 1 of my blog-series, which opens up more from the Office 365 E1 product suite. In this section, I’ll cover setting up an Office 365 environment from the very beginning to adding users. Once you’ve received the promo URL from your Microsoft partner, such as us, open the link in your browser’s private mode for easy deployment.
Ordering a trial subscription
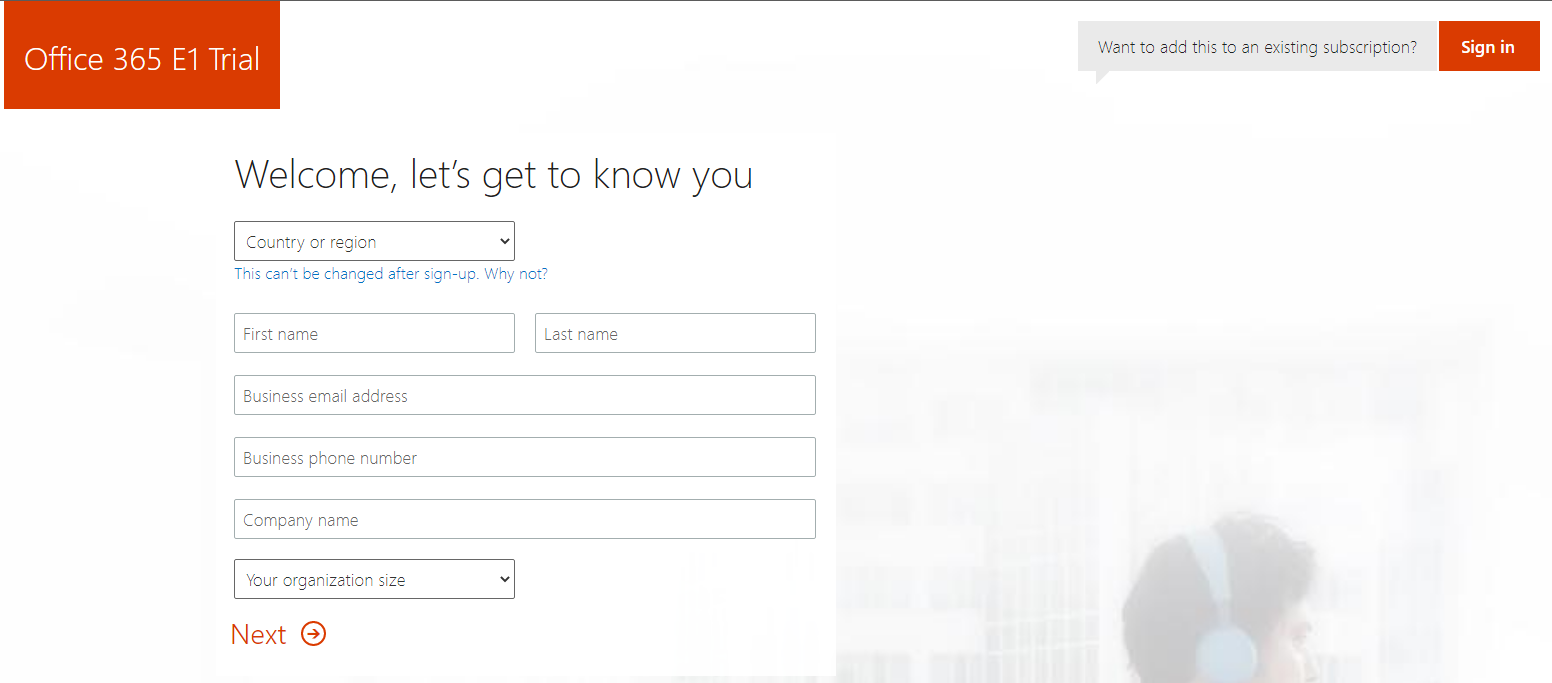
On the first page, you need to fill in this information. In Business email address, enter the email address you already have. You will receive basic information at that address afterwards. At the same time, pay attention to the text in the upper right corner: “Want to add this to an existing subsription?” This is in a situation where your company already has an Office 365 -environment, but you want to try out there what more E1 brings to it.
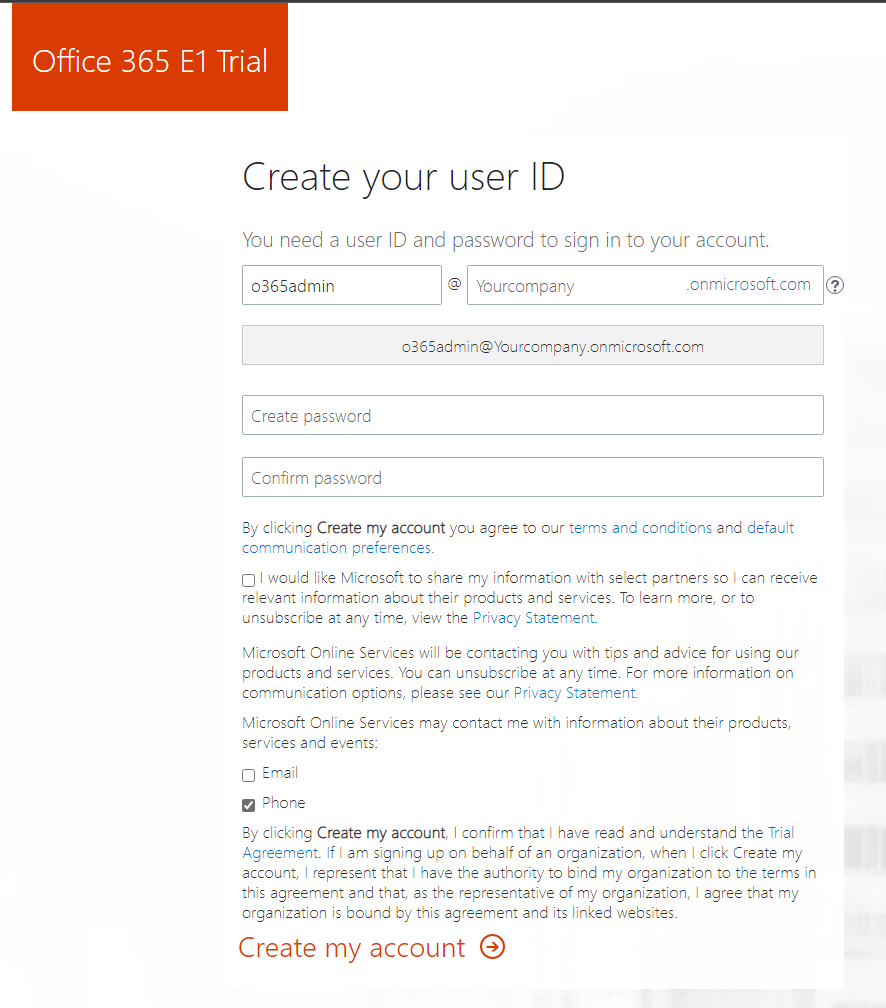
Next, you need to decide the first ID, the password, and the name of the Office 365 environment. You should choose the name carefully, as it cannot be changed afterwards. At the same time, the first user is the administrator account for the entire Office 365 environment, so save the account for yourself. I recommend using an unassigned ID in the example “o365admin”.
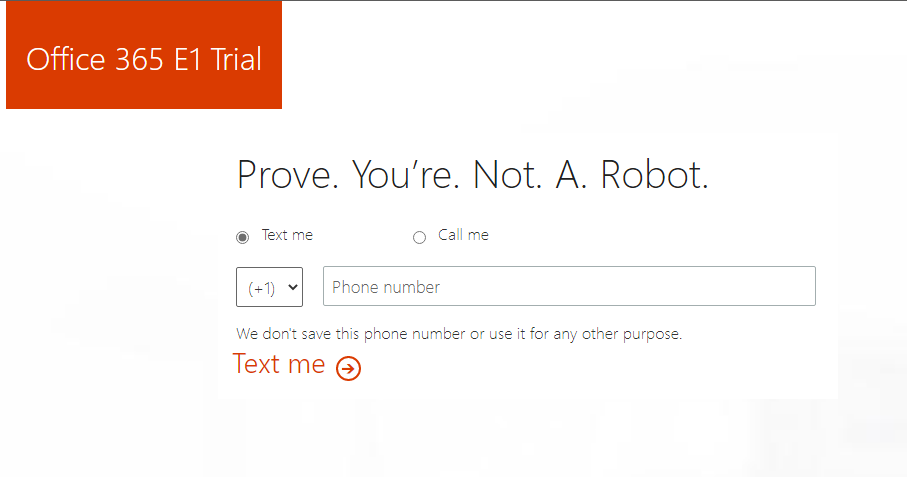
This is to ensure that you’re. Not. A. Robot. Enter a valid phone number in the field to which a verification code will be sent to you.
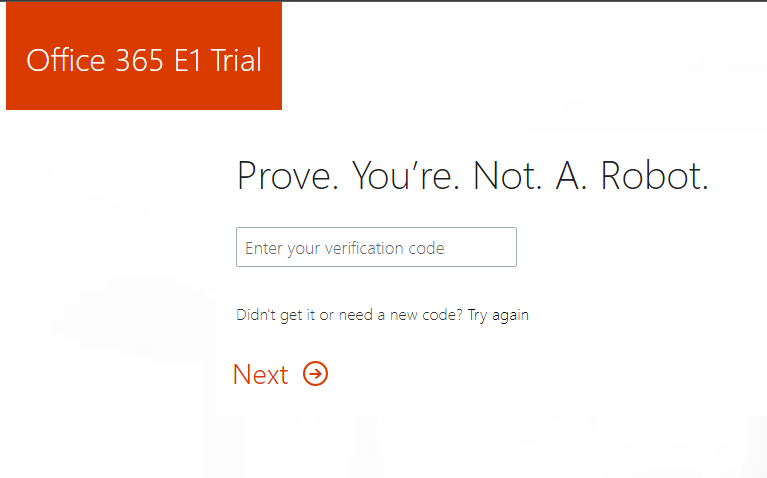
Enter the verification code you received in this field.
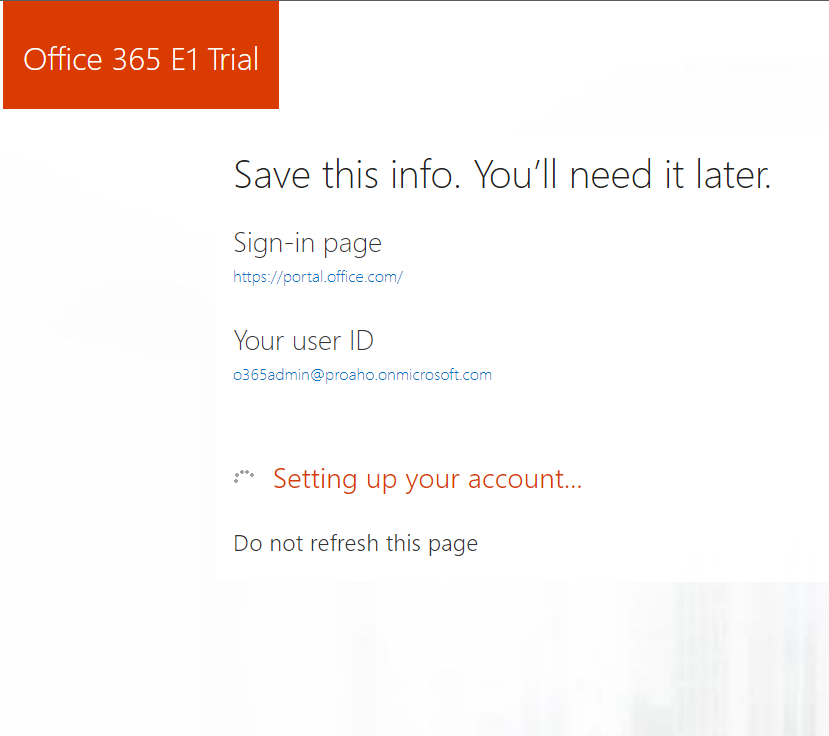
Next you will get a summary. It shows the address from which you can access your Office 365 environment and the administrator ID. This same information will also be emailed to the email address you provided at the beginning.
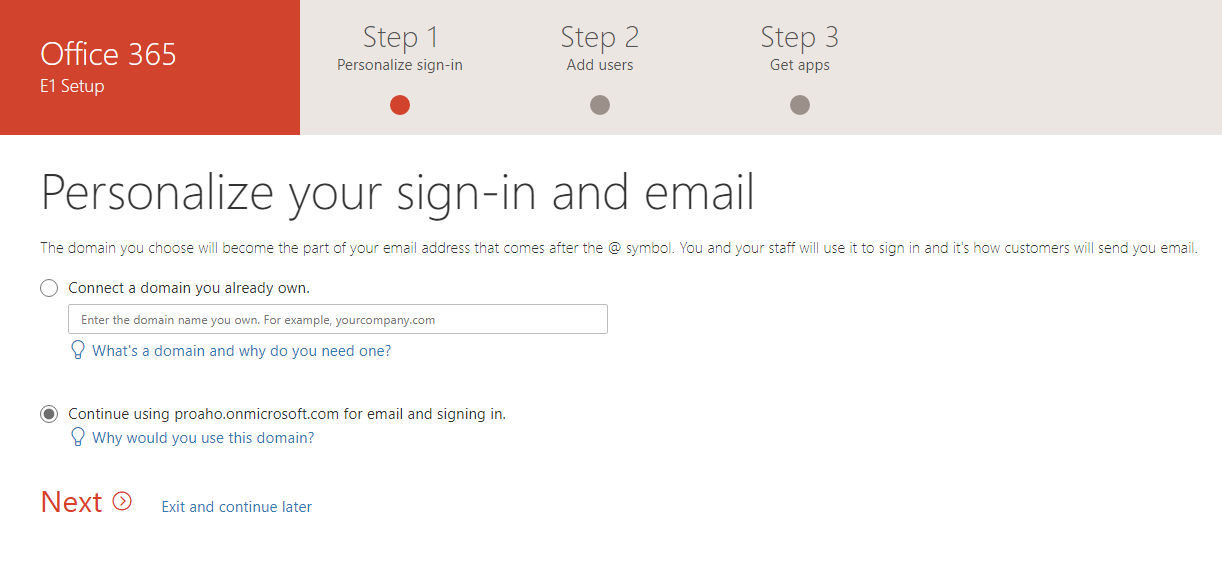
For the Office 365 E1 trial, you may not want to add a domain here. With the domain connection, you get the domain name acquired by your company, for example, for e-mails and user IDs. This connection can also be made afterwards.
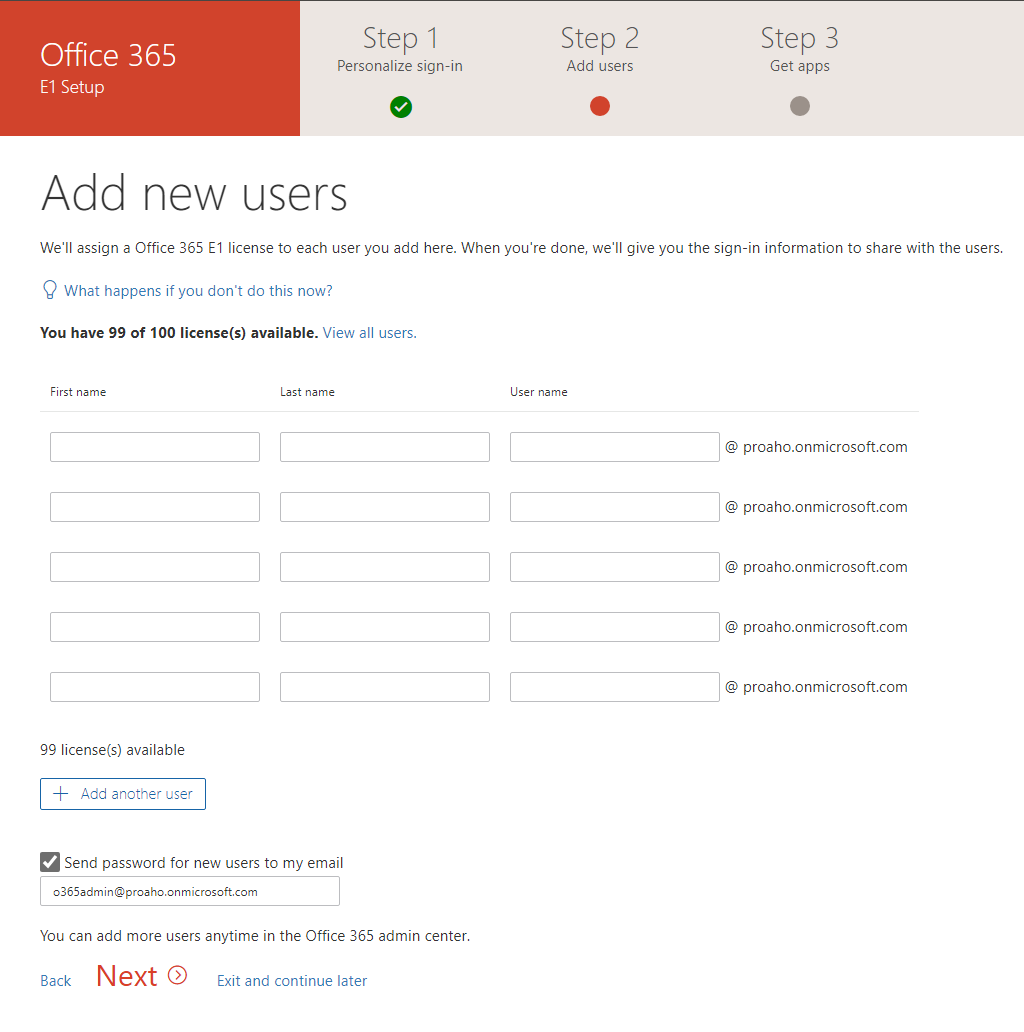
Next, users can be added. Here it would be good to add the first few users. The rest of the users can be imported from the Office 365 Admin Portal in bulk, so you shouldn’t add dozens of users at this point.
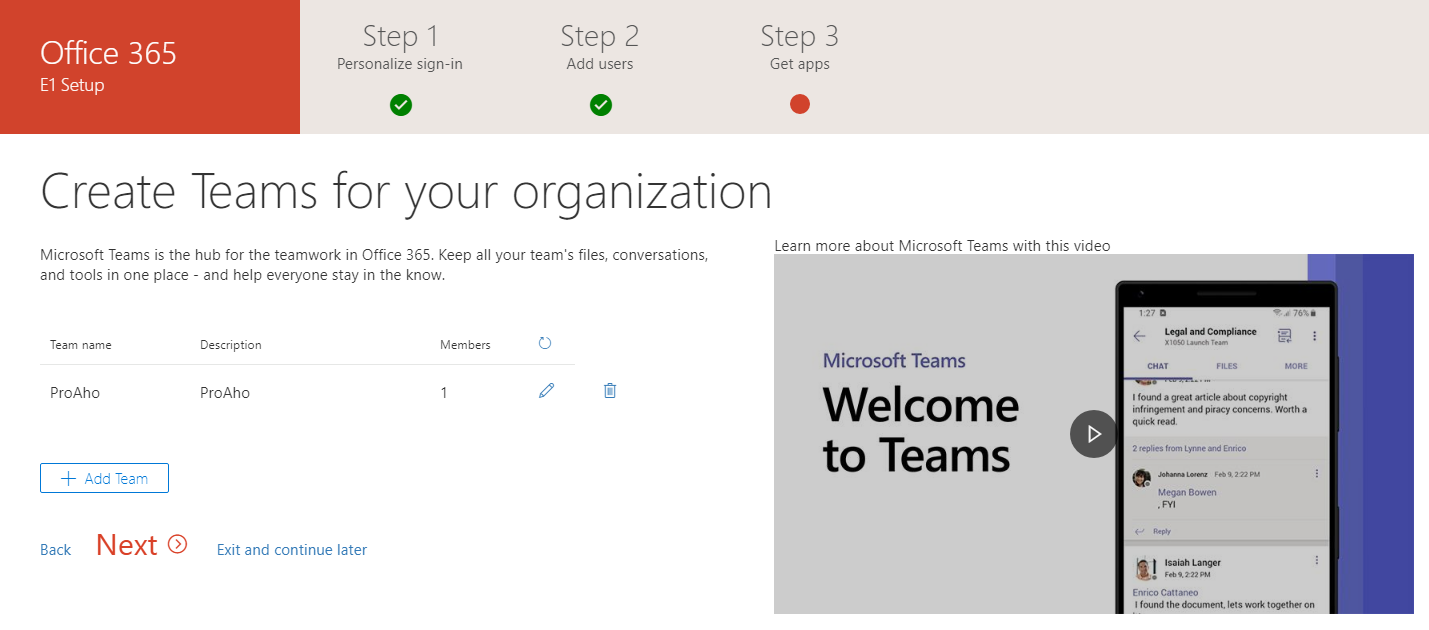
Microsoft Teams is an integral part of the E1 subsription, so this setting asks if you want to create additional groups. However, I recommend doing them directly on Teams or the management portal. By default, there is one group to which all users in your Office 365 environment are automatically joined.
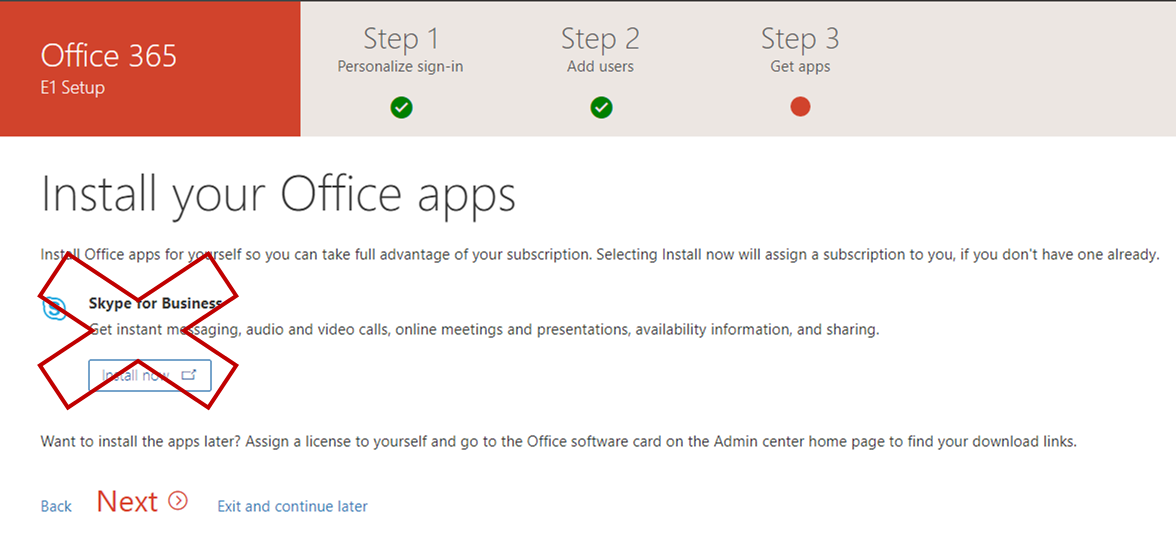
Because Office 365 E1 does not include Office Apps for Windows, only Skype for Business is shown here. Of course, it will not be installed, as Teams is more versatile and comfortable. In addition, the Skype for Business service is coming to an end, so it is no longer worth investing in.
Last thing, you can give feedback. You could also migrate emails right away. The migration can be done retrospectively and usually requires more detailed planning, so don’t do it at this point.
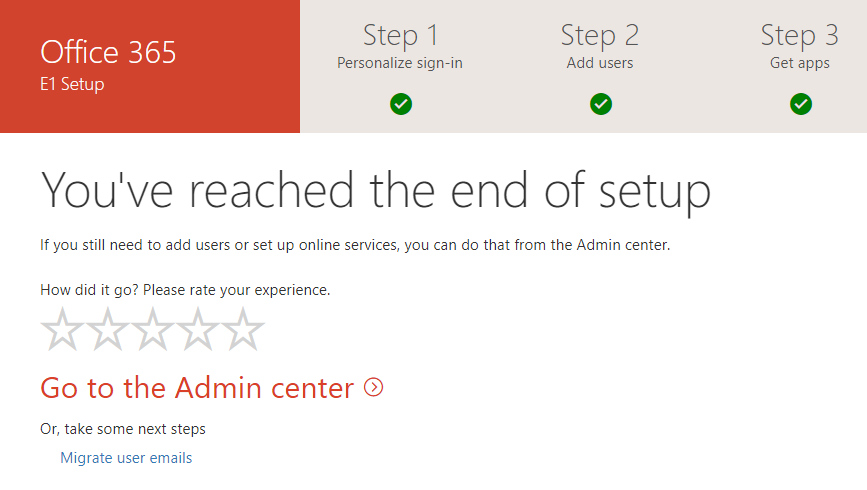
The end! Here is the Office 365 Admin center, which will become familiar in a moment. Now it’s a good idea to take a coffee break, as your Office 365 environment is still being prepared in the background.

Adding users to the Office 365 environment
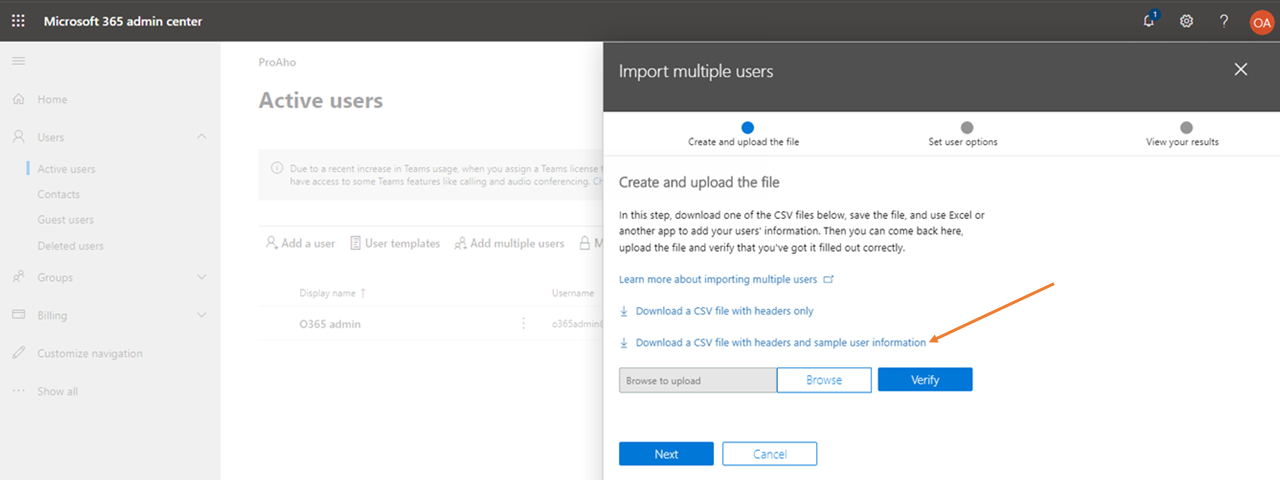
Next, let’s add users to your Office 365 environment. There are quite a few options to add users, in this example I am going to add users with the Add multiple users function.

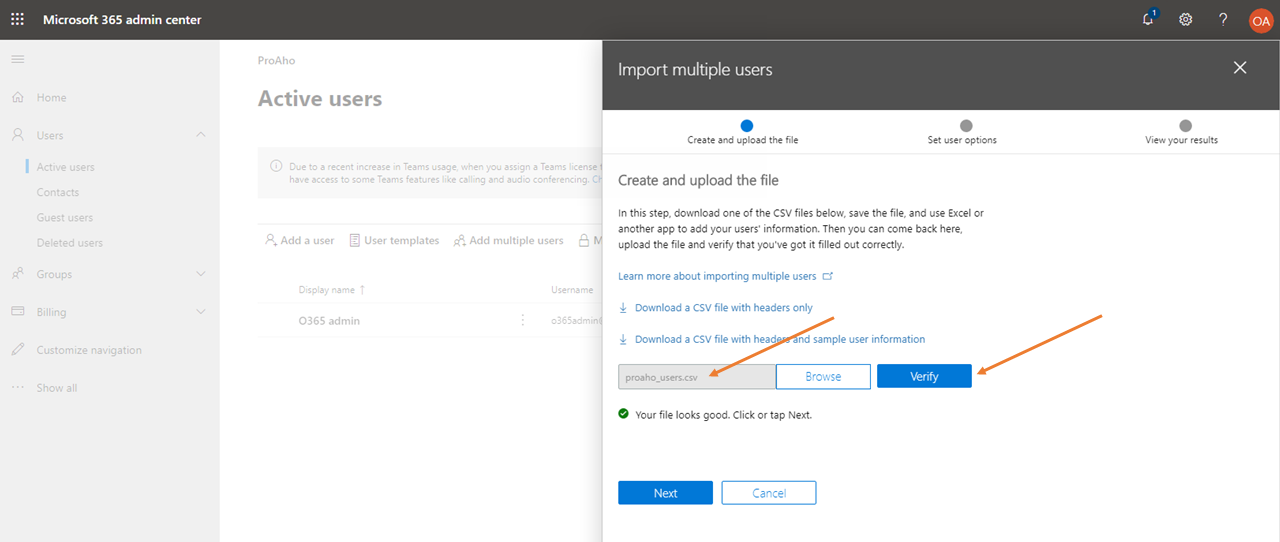
The idea of the add multiple users function is to first download the template file in CSV format, either with header fields or even template content. In this example, I will use template content and add myself as a user.
The sample file already has 5 users, which of course I will clear. The template file is a template separated by a CSV comma. With Excel, this is easy to set up. Of course, if your company gets user data imported from another system, it will make things easier.
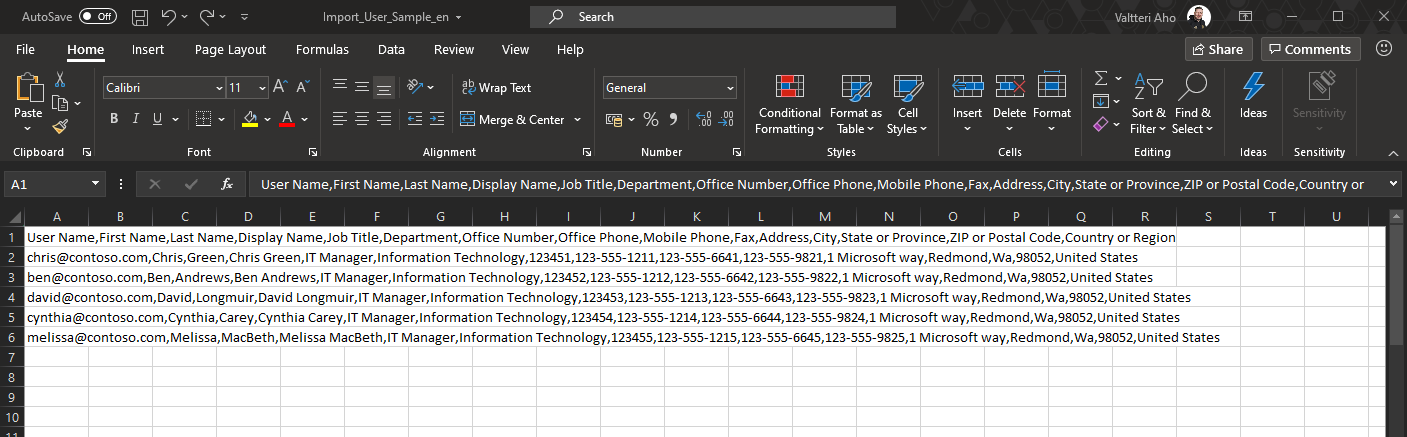
I type my own information according to the model. It is worth adding Mobile Phone number to use it in the future. NOTE! Check the file by opening it in Notepad to make sure the fields in the CSV file are comma separated.

Next, I send the file back to Office 365 and use the Verify button to verify that the file is in the correct format.
Next, the license is assigned to the users. In the example, I selected all the products in the entire E1 subsription.

You can download a handy spreadsheet for user exports, or get the same information via email. All that remains is to pass on the information to the user in the way you want.
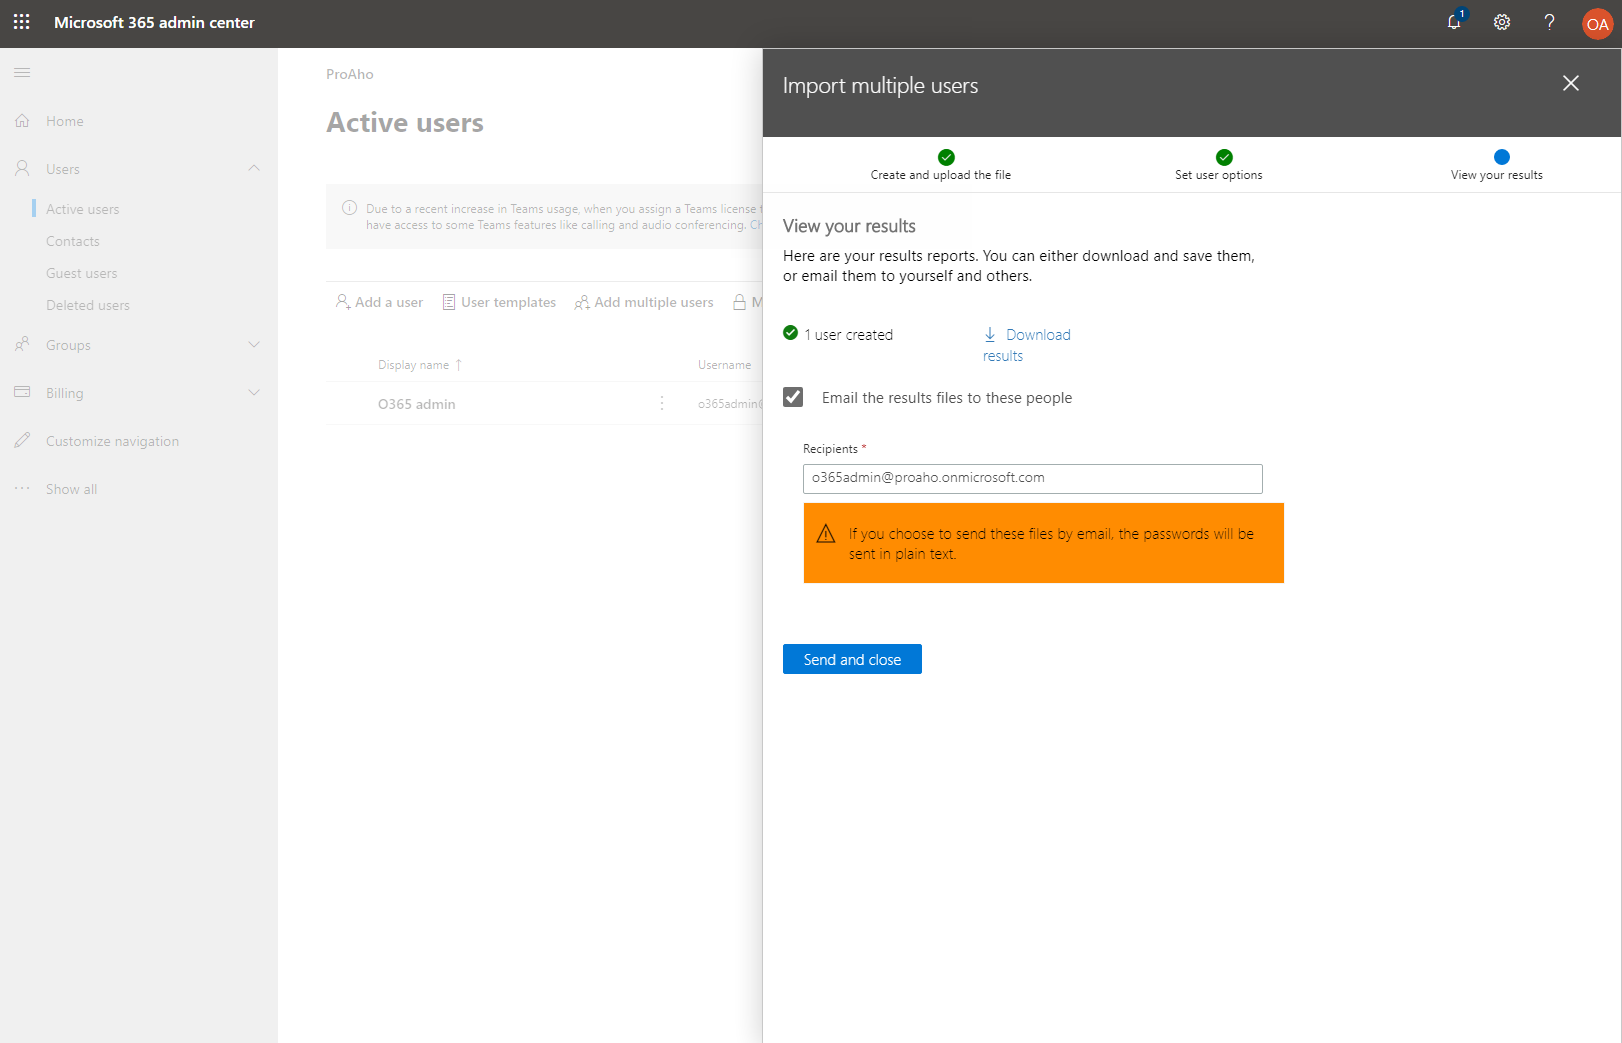
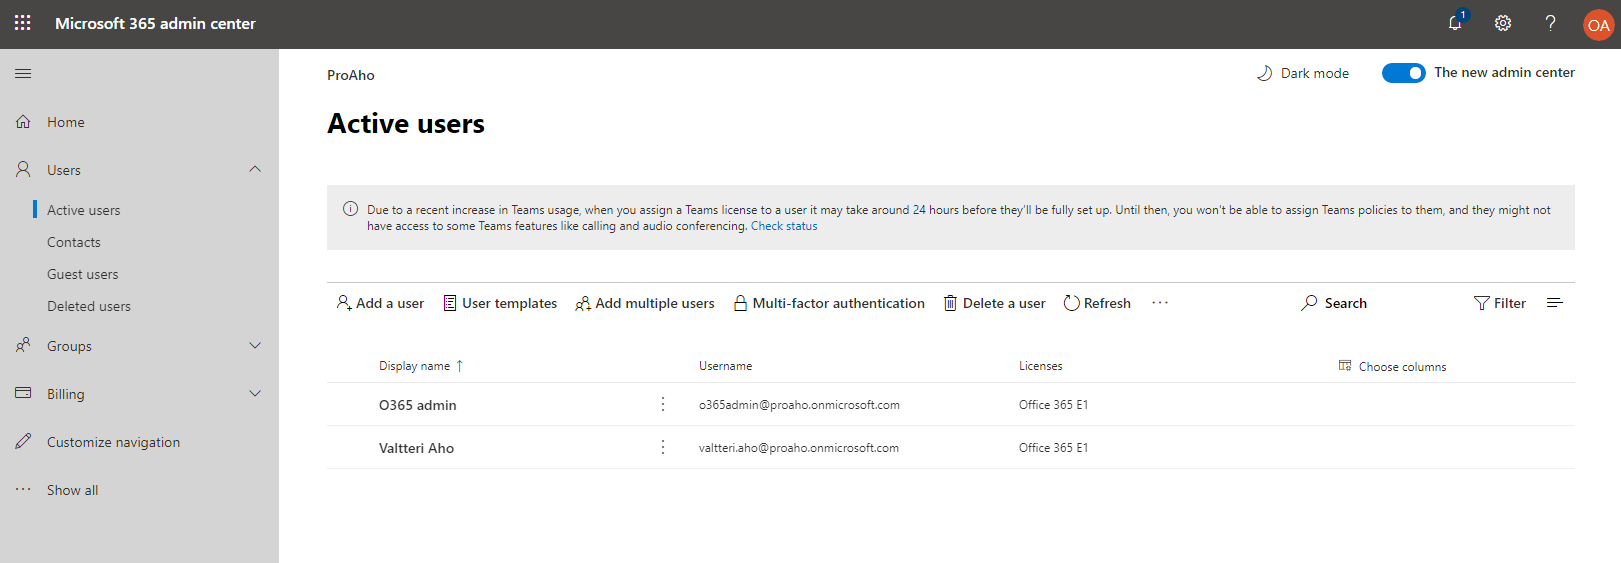
As a result, in the Office 365 environment, one user has been added.
This example provides a relatively easy way to set up an Office 365 E1 Trial environment and add users with their licenses. Nothing else is necessary to do now. Email transfers, domain configurations, and other configurations can be done very retrospectively. You can get help designing and executing these from Sulava. Contact us with the form below.
The next section focuses on the implementation of Microsoft Teams.
How to get your Office 365 environment up and running in minutes
Get to know how to set up an Office 365 environment from the very beginning to adding users.
 Our offer
Setting up an Office 365 environment for a customer who has not used the Office 365 services before. The tenant will be set up using the Microsoft Office 365 E1 trial license offering.